This is a Rust Crafting Calculator & Rust Recycle calculator in one. Just select an item and get useful information, just like the game. Press the buttons in the bottom to see crafting costs and what you get for scrapping each item.
Also check out our tools from the menu — like the Rust Raid Calculator for planning your next raid or Rust Aim Trainer to get better control of your spray.
×
 Sheet Metal Double Door
 Wood Double Door
 Wooden Door
 Floor Grill
 Ladder Hatch
 Floor Triangle Grill
 Triangle Ladder Hatch
 Chainlink Fence Gate
 Chainlink Fence
 Garage Door
 Netting
 Shop Front
 Metal Shop Front
 Watch Tower
 Prison Cell Gate
 Prison Cell Wall
 Metal Window Bars
 Wooden Window Bars
 Metal Horizontal Embrasure
 Metal Vertical Embrasure
 Strengthened Glass Window
 Wood Shutters
 Concrete Barricade
 Wooden Barricade Cover
 Sandbag Barricade
 Stone Barricade
 Wooden Barricade
 Building Plan
 Sheet Metal Door
 High External Wooden Gate
 High External Wooden Wall
 Reinforced Glass Window
 Barbed Wooden Barricade
 Large Water Catcher
 Small Water Catcher
 Key Lock
 Code Lock
 Armored Double Door
 Armored Door
 Metal Barricade
 Tool Cupboard
 High External Stone Gate
 High External Stone Wall
 Wooden Ladder
 Barbeque
 Camp Fire
 Composter
 Hitch & Trough
 Sofa
Sofa
 Vending Machine
 Hobo Barrel
 Kayak
Kayak
 Stone Fireplace
 Large Furnace
 Large Wood Box
 Mixing Table
 Large Planter Box
 Small Planter Box
 Repair Bench
 Salvaged Shelves
 Small Wooden Sign
 Small Stash
 Survival Fish Trap
 Wood Storage Box
 Bota Bag
 Bed
Bed
 Chair
Chair
 Drop Box
 Fridge
 Lantern
 Water Barrel
 Locker
 Mail Box
 Small Oil Refinery
 Rug Bear Skin
 Rug
Rug
 Large Wooden Sign
 Medium Wooden Sign
 Sleeping Bag
 Spinning Wheel
 Table
Table
 Tuna Can Lamp
 Water Purifier
 Research Table
 Huge Wooden Sign
 Work Bench Level 1
 Work Bench Level 2
 Work Bench Level 3
 Furnace
 Low Grade Fuel
 Explosives
 Gun Powder
 CCTV Camera
 Empty Can of Beans
 Empty Tuna Can
 Targeting Computer
 Frog Boots
 Bone Helmet
 Heavy Plate Helmet
 Bone Armor
 Heavy Plate Jacket
 Heavy Plate Pants
 Hazmat Suit
 T-shirt
 Wooden Horse Armor
 Saddle Bag
 Basic Horse Shoes
 Burlap Gloves
 Leather Gloves
 Burlap Headwrap
 Candle Hat
 Wood Armor Helmet
 Hoodie
 Wood Chestplate
 Burlap Trousers
 Wood Armor Pants
 Pants
Pants
 Burlap Shirt
 Burlap Shoe
 Hide Skirt
 Longsleeve T-shirt
 Wolf Headdress
 Road Sign Gloves
 Hide Helterneck
 Beenie Hat
 Bucket Helmet
 Miners Hat
 Jacket
 Improvised Balaclava
 Hide Pants
 Shorts
 Hide Poncho
 Shirt
Shirt
 Hide Vest
 Tank Top
 Boots
Boots
 Hide Boots
 High Quality Horse Shoes
 Coffee Can Helmet
 Riot Helmet
 Snow Jacket
 Night Vision Goggles
 Road Sign Kilt
 Road Sign Jacket
 Roadsign Horse Armor
 Metal Facemask
 Metal Chest Plate
 Bandana Mask
 Baseball Cap
 Boonie Hat
 Hammer
 Rock
Rock
 Garry's Mod Tool Gun
 RF Transmitter
 Flare
Flare
 Flashlight
 Stone Hatchet
 Stone Pickaxe
 Water Bucket
 Jackhammer
 Binoculars
 Survey Charge
 Chainsaw
 Hatchet
 Salvaged Axe
 Salvaged Hammer
 Torch
Torch
 Smoke Grenade
 Pickaxe
 Salvaged Icepick
 Satchel Charge
 Timed Explosive Charge
 Medical Syringe
 Bandage
 Large Medkit
 Simple Handmade Sight
 MP4A4
MP4A4
 Python Revolver
 Bone Club
 Bone Knife
 Hunting Bow
 Machete
 Paddle
 Stone Spear
 Salvaged Sword
 Wooden Spear
 Beancan Grenade
 Compound Bow
 Crossbow
 Eoka Pistol
 Combat Knife
 Nailgun
 Revolver
 Salvaged Cleaver
 Double Barrel Shotgun
 F1 Grenade
 Flame Thrower
 Mace
Mace
 Waterpipe Shotgun
 Pump Shotgun
 Semi-Automatic Pistol
 Semi-Automatic Rifle
 Longsword
 Thompson
 Weapon Flashlight
 Holosight
 Weapon Lasersight
 Muzzle Boost
 Muzzle Brake
 Silencer
 8x Zoom Scope
 Assault Rifle
 Bolt Action Rifle
 Rocket Launcher
 Custom SMG
 16x Zoom Scope
 Butcher Knife
 L96 Rifle
 LR-300 Assault Rifle
 M249
M249
 M39 Rifle
 M92 Pistol
 Multiple Grenade Launcher
 SPAS-12 Shotgun
 Wooden Arrow
 Bone Arrow
 Fire Arrow
 Handmade Shell
 Nailgun Nails
 Pistol Bullet
 High Velocity Arrow
 5.56 Rifle Ammo
 12 Gauge Buckshot
 SAM Ammo
 Incendiary Pistol Bullet
 HV Pistol Bullet
 Explosive 5.56 Rifle Ammo
 Incendiary 5.56 Rifle Ammo
 HV 5.56 Rifle Ammo
 Rocket
 Incendiary Rocket
 High Velocity Rocket
 12 Gauge Incendiary Shell
 12 Gauge Slug
 Wooden Floor Spikes
 Snap Trap
 Land Mine
 Shotgun Trap
 Flame Turret
 SAM Site
 Elevator
 Audio Alarm
 Storage Monitor
 Large Rechargable Battery
 Medium Rechargable Battery
 Small Rechargeable Battery
 Button
 Counter
 HBHF Sensor
 Laser Detector
 Pressure Pad
 Door Controller
 Fluid Combiner
 Fluid Splitter
 Fluid Switch & Pump
 AND Switch
 Blocker
 Electrical Branch
 Root Combiner
 Memory Cell
 OR Switch
 RAND Switch
 XOR Switch
 Small Generator
 Large Solar Panel
 Switch
 Splitter
 Timer
Timer
 Hose Tool
 Wire Tool
 Igniter
 Flasher Light
 Siren Light
 Sprinkler
 Tesla Coil
 Ceiling Light
 Computer Station
 Smart Alarm
 Smart Switch
 Electric Heater
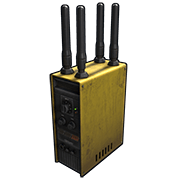 RF Broadcaster
 RF Receiver
 Powered Water Purifier
 Water Pump
 Reactive Target
 Modular Car Lift
 Search Light
 Wind Turbine
 RF Pager
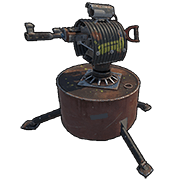 Auto Turret
 Test Generator
 Telephone
 Gears
Gears
 Electric Fuse
 Metal Blade
 Metal Pipe
 Empty Propane Tank
 Road Signs
 Sewing Kit
 Metal Spring
 Rifle Body
 SMG Body
 Semi Automatic Body
 Rope
Rope
 Sheet Metal
 Tech Trash
 Tarp
Tarp
 Graveyard Fence
 Note
Note
 Low Quality Carburetor
 Low Quality Crankshaft
 Low Quality Pistons
 Low Quality Spark Plugs
 Low Quality Valves
 Medium Quality Carburetor
 Medium Quality Crankshaft
 Medium Quality Pistons
 Medium Quality Spark Plugs
 Medium Quality Valves
 High Quality Carburetor
 High Quality Crankshaft
 High Quality Pistons
 High Quality Spark Plugs
 High Quality Valves
 Cockpit Vehicle Module
 Armored Cockpit Vehicle Module
 Cockpit with Engine Vehicle Module
 Engine Vehicle Module
 Flatbed Vehicle Module
 Armored Passenger Vehicle Module
 Rear Seats Vehicle Module
 Storage Vehicle Module
 Taxi Vehicle Module
 Large Flatbed Vehicle Module
 Fuel Tank Vehicle Module
 Passenger Vehicle Module
 0 No item selected
Updated
 Sheet Metal Double Door
 Wood Double Door
 Wooden Door
 Floor Grill
 Ladder Hatch
 Floor Triangle Grill
 Triangle Ladder Hatch
 Chainlink Fence Gate
 Chainlink Fence
 Garage Door
 Netting
 Shop Front
 Metal Shop Front
 Watch Tower
 Prison Cell Gate
 Prison Cell Wall
 Metal Window Bars
 Wooden Window Bars
 Metal Horizontal Embrasure
 Metal Vertical Embrasure
 Strengthened Glass Window
 Wood Shutters
 Concrete Barricade
 Wooden Barricade Cover
 Sandbag Barricade
 Stone Barricade
 Wooden Barricade
 Building Plan
 Sheet Metal Door
 High External Wooden Gate
 High External Wooden Wall
 Reinforced Glass Window
 Barbed Wooden Barricade
 Large Water Catcher
 Small Water Catcher
 Key Lock
 Code Lock
 Armored Double Door
 Armored Door
 Metal Barricade
 Tool Cupboard
 High External Stone Gate
 High External Stone Wall
 Wooden Ladder
 Barbeque
 Camp Fire
 Composter
 Hitch & Trough
 Sofa
Sofa Vending Machine
 Hobo Barrel
 Kayak
Kayak Stone Fireplace
 Large Furnace
 Large Wood Box
 Mixing Table
 Large Planter Box
 Small Planter Box
 Repair Bench
 Salvaged Shelves
 Small Wooden Sign
 Small Stash
 Survival Fish Trap
 Wood Storage Box
 Bota Bag
 Bed
Bed Chair
Chair Drop Box
 Fridge
 Lantern
 Water Barrel
 Locker
 Mail Box
 Small Oil Refinery
 Rug Bear Skin
 Rug
Rug Large Wooden Sign
 Medium Wooden Sign
 Sleeping Bag
 Spinning Wheel
 Table
Table Tuna Can Lamp
 Water Purifier
 Research Table
 Huge Wooden Sign
 Work Bench Level 1
 Work Bench Level 2
 Work Bench Level 3
 Furnace
 Low Grade Fuel
 Explosives
 Gun Powder
 CCTV Camera
 Empty Can of Beans
 Empty Tuna Can
 Targeting Computer
 Frog Boots
 Bone Helmet
 Heavy Plate Helmet
 Bone Armor
 Heavy Plate Jacket
 Heavy Plate Pants
 Hazmat Suit
 T-shirt
 Wooden Horse Armor
 Saddle Bag
 Basic Horse Shoes
 Burlap Gloves
 Leather Gloves
 Burlap Headwrap
 Candle Hat
 Wood Armor Helmet
 Hoodie
 Wood Chestplate
 Burlap Trousers
 Wood Armor Pants
 Pants
Pants Burlap Shirt
 Burlap Shoe
 Hide Skirt
 Longsleeve T-shirt
 Wolf Headdress
 Road Sign Gloves
 Hide Helterneck
 Beenie Hat
 Bucket Helmet
 Miners Hat
 Jacket
 Improvised Balaclava
 Hide Pants
 Shorts
 Hide Poncho
 Shirt
Shirt Hide Vest
 Tank Top
 Boots
Boots Hide Boots
 High Quality Horse Shoes
 Coffee Can Helmet
 Riot Helmet
 Snow Jacket
 Night Vision Goggles
 Road Sign Kilt
 Road Sign Jacket
 Roadsign Horse Armor
 Metal Facemask
 Metal Chest Plate
 Bandana Mask
 Baseball Cap
 Boonie Hat
 Hammer
 Rock
Rock Garry's Mod Tool Gun
 RF Transmitter
 Flare
Flare Flashlight
 Stone Hatchet
 Stone Pickaxe
 Water Bucket
 Jackhammer
 Binoculars
 Survey Charge
 Chainsaw
 Hatchet
 Salvaged Axe
 Salvaged Hammer
 Torch
Torch Smoke Grenade
 Pickaxe
 Salvaged Icepick
 Satchel Charge
 Timed Explosive Charge
 Medical Syringe
 Bandage
 Large Medkit
 Simple Handmade Sight
 MP4A4
MP4A4 Python Revolver
 Bone Club
 Bone Knife
 Hunting Bow
 Machete
 Paddle
 Stone Spear
 Salvaged Sword
 Wooden Spear
 Beancan Grenade
 Compound Bow
 Crossbow
 Eoka Pistol
 Combat Knife
 Nailgun
 Revolver
 Salvaged Cleaver
 Double Barrel Shotgun
 F1 Grenade
 Flame Thrower
 Mace
Mace Waterpipe Shotgun
 Pump Shotgun
 Semi-Automatic Pistol
 Semi-Automatic Rifle
 Longsword
 Thompson
 Weapon Flashlight
 Holosight
 Weapon Lasersight
 Muzzle Boost
 Muzzle Brake
 Silencer
 8x Zoom Scope
 Assault Rifle
 Bolt Action Rifle
 Rocket Launcher
 Custom SMG
 16x Zoom Scope
 Butcher Knife
 L96 Rifle
 LR-300 Assault Rifle
 M249
M249 M39 Rifle
 M92 Pistol
 Multiple Grenade Launcher
 SPAS-12 Shotgun
 Wooden Arrow
 Bone Arrow
 Fire Arrow
 Handmade Shell
 Nailgun Nails
 Pistol Bullet
 High Velocity Arrow
 5.56 Rifle Ammo
 12 Gauge Buckshot
 SAM Ammo
 Incendiary Pistol Bullet
 HV Pistol Bullet
 Explosive 5.56 Rifle Ammo
 Incendiary 5.56 Rifle Ammo
 HV 5.56 Rifle Ammo
 Rocket
 Incendiary Rocket
 High Velocity Rocket
 12 Gauge Incendiary Shell
 12 Gauge Slug
 Wooden Floor Spikes
 Snap Trap
 Land Mine
 Shotgun Trap
 Flame Turret
 SAM Site
 Elevator
 Audio Alarm
 Storage Monitor
 Large Rechargable Battery
 Medium Rechargable Battery
 Small Rechargeable Battery
 Button
 Counter
 HBHF Sensor
 Laser Detector
 Pressure Pad
 Door Controller
 Fluid Combiner
 Fluid Splitter
 Fluid Switch & Pump
 AND Switch
 Blocker
 Electrical Branch
 Root Combiner
 Memory Cell
 OR Switch
 RAND Switch
 XOR Switch
 Small Generator
 Large Solar Panel
 Switch
 Splitter
 Timer
Timer Hose Tool
 Wire Tool
 Igniter
 Flasher Light
 Siren Light
 Sprinkler
 Tesla Coil
 Ceiling Light
 Computer Station
 Smart Alarm
 Smart Switch
 Electric Heater
 RF Broadcaster
 RF Receiver
 Powered Water Purifier
 Water Pump
 Reactive Target
 Modular Car Lift
 Search Light
 Wind Turbine
 RF Pager
 Auto Turret
 Test Generator
 Telephone
 Gears
Gears Electric Fuse
 Metal Blade
 Metal Pipe
 Empty Propane Tank
 Road Signs
 Sewing Kit
 Metal Spring
 Rifle Body
 SMG Body
 Semi Automatic Body
 Rope
Rope Sheet Metal
 Tech Trash
 Tarp
Tarp Graveyard Fence
 Note
Note Low Quality Carburetor
 Low Quality Crankshaft
 Low Quality Pistons
 Low Quality Spark Plugs
 Low Quality Valves
 Medium Quality Carburetor
 Medium Quality Crankshaft
 Medium Quality Pistons
 Medium Quality Spark Plugs
 Medium Quality Valves
 High Quality Carburetor
 High Quality Crankshaft
 High Quality Pistons
 High Quality Spark Plugs
 High Quality Valves
 Cockpit Vehicle Module
 Armored Cockpit Vehicle Module
 Cockpit with Engine Vehicle Module
 Engine Vehicle Module
 Flatbed Vehicle Module
 Armored Passenger Vehicle Module
 Rear Seats Vehicle Module
 Storage Vehicle Module
 Taxi Vehicle Module
 Large Flatbed Vehicle Module
 Fuel Tank Vehicle Module
 Passenger Vehicle Module
 0
0 No item selected
| Crafting Amount |
Crafting Item type |
Crafting Total |
| Recycle Amount |
Recycle Item type |
Recycle Total |
Recycle is per 1 item.
