Ever wanted to run an own Rust Dedicated Rust server locally from your computer? Install and set up your own dedicated Rust server is easier than most people think. This how-to guide is for the installation of a server on Windows.
System Requirements for server
As you may already know, Rust is a game that loves memory as much as Chrome does. The test-server (uMod Oxide server) we run mostly for shooting videos on takes about 4-6 GB of memory. We recommend that you have as such when starting off.
TL;DR — You need at least 4-6 GB.
1. Installing SteamCMD
SteamCMD is the command central of Steam related files and the heart of installing and updating the Rust server.
- Create a folder for SteamCMD to be installed, preferably on an internal SSD.
Example:c:\steamcmd - Create another folder for the server.
Example:c:\rustserver - Download SteamCMD for Windows
- Extract the files — with 7-zip, WinRAR or whatever you use — to the steamcmd folder you made in the first step.
- Start the
steamcmd.exefile.
When you execute steamcmd.exe, it will download, install and update itself to the latest version of SteamCMD.
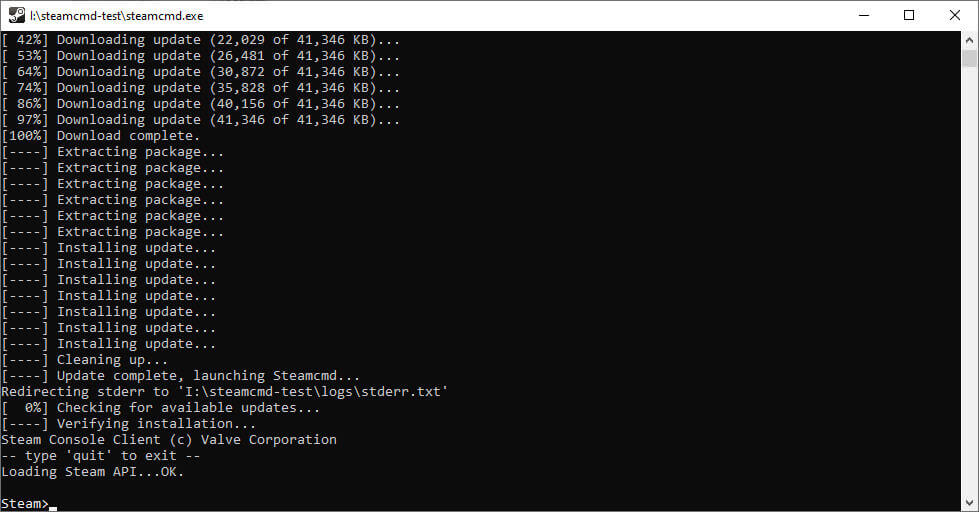
As seen above, the installer will run automatically, and it takes a minute or two depending on your bandwidth.
2. Installing your Rust Dedicated Server
Run some commands at the Steam>_ prompt to start downloading the necessary files for the server. Do not copy all and paste, but one line at the time.
login anonymous
force_install_dir "c:\rustserver\"
app_update 258550
quit
This is the normal installation of vanilla type server. Modded server like requires more work, but we will cover it later in this guide.
3. Create a batch file to start the server
You will need to create a small batch file in order to get the server to run. Open your favorite text editor — Notepad, Notepad++, Brackets, or whatever you like — and create a file called something like start-server.bat. You can choose your own name of the file, don’t stick to my habits of bad names.
4. This batch file needs configuration
An empty batch file does not do anything on its own, of course, so we need to put some commands in it in order to execute the server. If you installed your SteamCMD and/or Rust server folder differently than above, please make changes to the commands below to fit your installation folder.
Basic example:
echo off
:start
c:\steamcmd\steamcmd.exe +login anonymous +force_install_dir
RustDedicated.exe -batchmode +server.port 28015 +server.level "Procedural Map" +server.seed 1234 +server.worldsize 4000 +server.maxplayers 10 +server.hostname "NAME OF YOUR SERVER" +server.description "THIS IS THE DESCRIPTION OF THE SERVER" +server.url "https://rusttips.com" +server.headerimage "https://rusttips.com/sources/images/rust-server-img.jpg" +server.identity "server1" +rcon.port 28016 +rcon.password letmein +rcon.web 1
goto start
You need to make your own changes from this example.
+server.port 28015
Default port that server use. Recommend to not change, but in some cases you can change.
+server.seed 1234
You can change this seed to something you like. Check this site out for different seeds for your map.
+server.maxplayers 10
Pretty much self-explanatory. Sets the maximum of players on the server. You may increase or decrease.
+server.worldsize 4000
This is the size of the map. Increase the number to make it bigger, or decrease to make it smaller.
+server.hostname "NAME OF YOUR SERVER"
Change the text in the brackets to your own server name.
+server.description "THIS IS THE DESCRIPTION OF THE SERVER"
Change the text in the brackets to something better.
+server.url "https://rusttips.com"
Got a website for your server, maybe? Set your own URL in here.
+server.headerimage "https://rusttips.com/sources/images/rust-server-img.jpg"
This image will show on the server list in Rust. Change it to fit your server best. You’ll need to use an JPG of 512×256 pixels.
+rcon.password letmein
Change this password. Really. It’s not safe at all. Do not use spaces or special characters, either.
goto start
This tells the server to restart automatically after you shut it down. You may remove this line if you like.
5. Finally connect to your server in Rust
Remember to start the start-server.bat file once you have changed everything above. Open Rust, press F1 in-game and type in the following command:
client.connect localhost:28015
If you changed the +server.port earlier, you need to replace 28015 with your port, but I assume you listened to me and didn’t change it.
6. Giving yourself some admin powers
Once you’re logged in to the server, you need to give yourself some godlike powers. The way to do so is by using ownerid command in the console. You also need the SteamID number for your account. Your ID will display in the console once you log into the server.
Example:
ownerid 12345678901234567 "Admiral General Aladeen"
Tip: You can find many useful commands from our Rust Server Admin Commands guide
7. Running uMod Oxide on the server (optional)
This will open many possibilities for your server. Install free plugins, change play modes, modify what ever you would like, add custom events and much, much more.
Be aware that you must stop the server before doing any of the steps below. Run the command quit in order to stop it.
Step 1
Download the latest version of uMod Oxide. You will find the download at this site https://umod.org/games/rust. Make sure it updated to your server version.

Step 2
Once the file has finished downloading, go to the root folder of the server you created. That will be c:\rustserver if you didn’t change it earlier. The ZIP file contains a folder called RustDedicated_Data and you need to extract it to the server root folder. Overwrite any existing files.
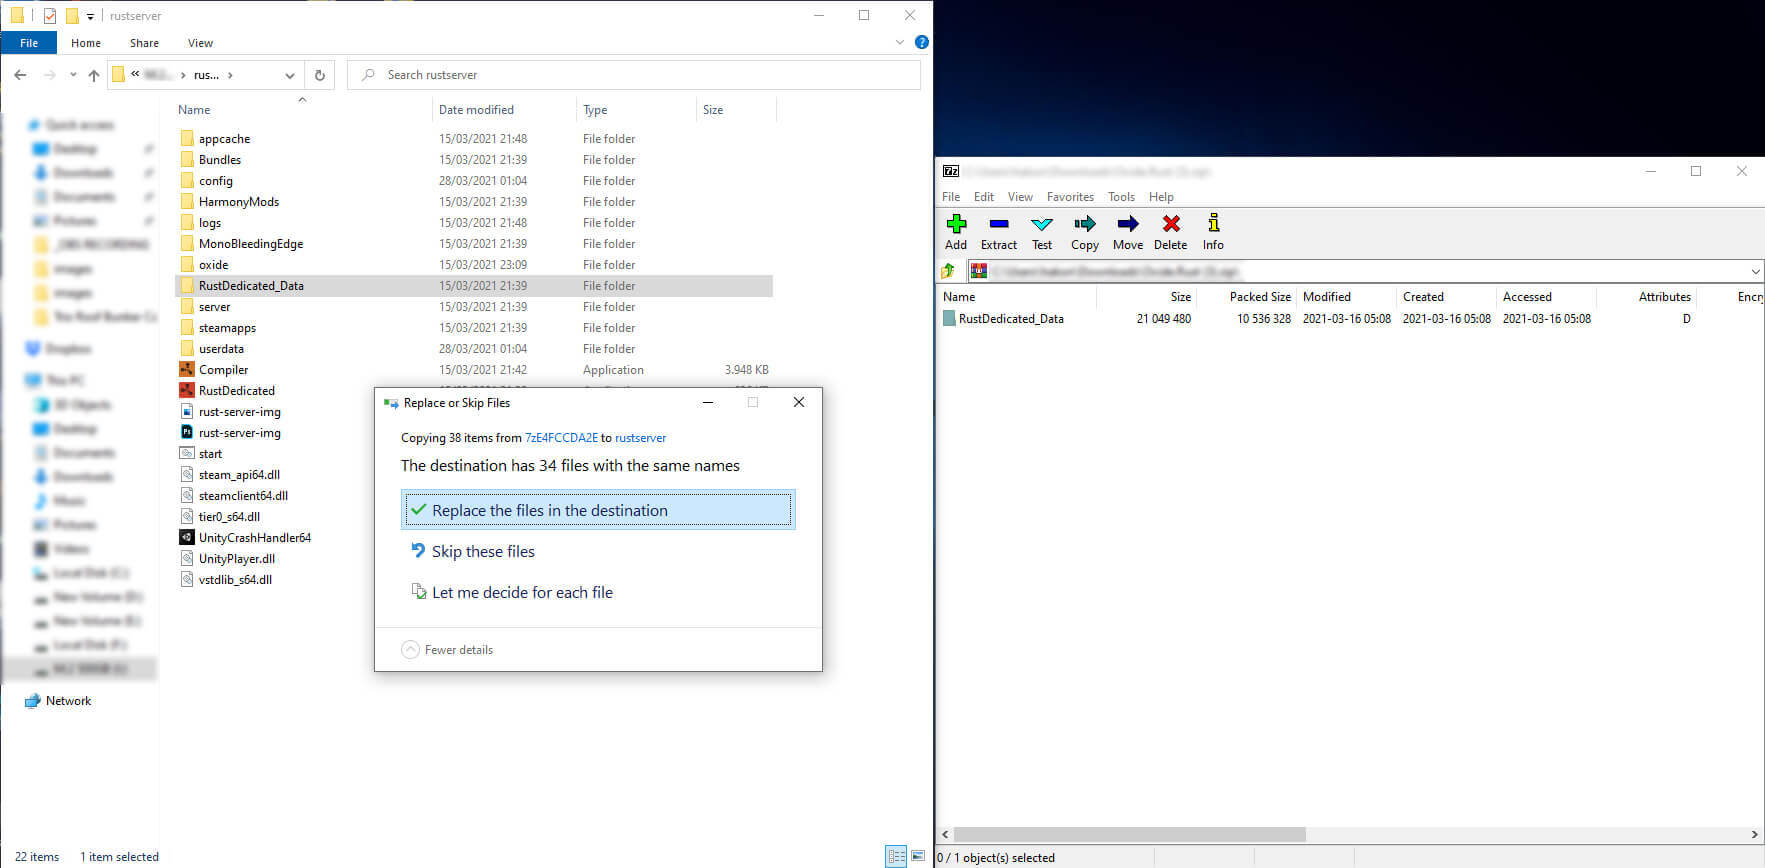
Step 3
Start the start-server.bat file once copying is finished. Now we need to verify that it’s actually working. Check the version by running this command oxide.version.
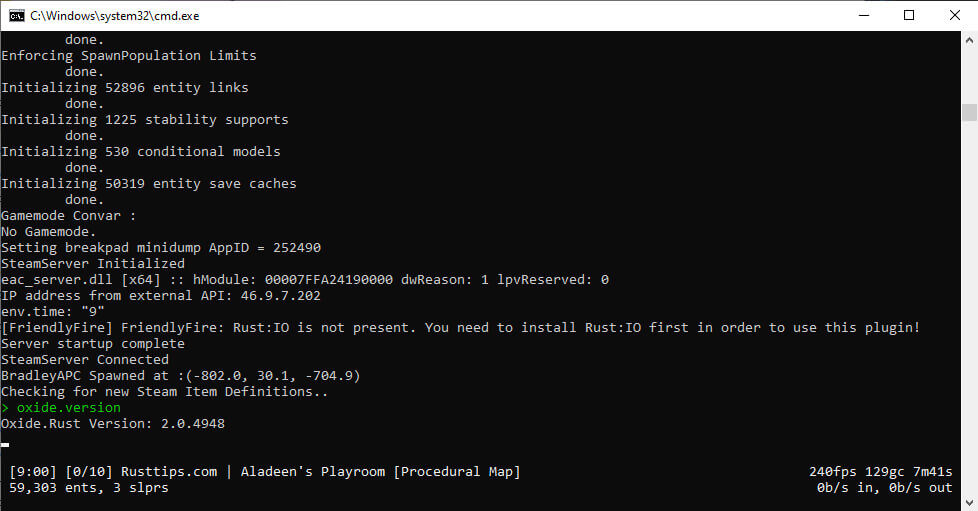
Above is an example from my server, and it’s running with version 2.0.4948. (March 2021)
8. You’re done!
You now successfully installed a functional server, and you can browse uMod’s website for plugins to install to it. Head over to https://umod.org/plugins and browse for free plugins.
Here is a small list of plugins I run on my server to record videos. Totally optional.
- Always Day — Visit plugin site
- Anti Items — Visit plugin site
- BGrade — Visit plugin site
- Blueprint Manager — Visit plugin site
- Everlight — Visit plugin site
- Free Build — Visit plugin site
- Friendly Fire — Visit plugin site
- Godmode — Visit plugin site
- Instant Craft — Visit plugin site
- No Decay — Visit plugin site
- No Give Notices — Visit plugin site
- No Workbench — Visit plugin site
- Remover Tool — Visit plugin site
- Research Unlocked — Visit plugin site
- Stack Size Controller — Visit plugin site


